Choosing polymeric sand for pavers is not a minor finishing decision. It affects joint stability, surface appearance, weed resistance, and long-term maintenance. A beautiful patio can still fail when the sand does not match the paver type, joint width, or local weather conditions.
Experienced installers usually inspect the project before opening a bag. They check whether the joints are narrow or wide, whether water drains quickly, and whether the surface receives heavy foot traffic. They also read the product label carefully. Manufacturers may specify moisture limits, curing times, and compatible paver materials. Ignoring those details can leave hazy residue on the pavers or weak, crumbling joints.
Small details matter.
This guide explains seven practical tips for selecting polymeric sand for pavers with greater confidence. It considers product quality, color matching, climate, installation conditions, and expected use. Reliable advice should come from product documentation, experienced contractors, and recognized industry guidance, not only from attractive packaging or online comments.
There is no perfect product for every project. That is worth remembering. A sand that performs well on a dry driveway may behave differently on a shaded walkway. Even careful installers can overlook drainage or apply too much water. Reviewing these risks before installation makes mistakes less expensive and easier to prevent. The right choice supports a cleaner finish, stronger joints, and fewer repairs over time.
Polymeric sand is a graded jointing material mixed with special binding polymers. It fills the narrow spaces between pavers and hardens after controlled wetting. Unlike ordinary sand, it helps resist joint erosion, weed growth, insect disturbance, and surface washout. Its role is practical: it locks adjoining pavers together while allowing the paved surface to remain slightly flexible.
During paver installation, clean and fully dry joints matter. Any leftover dust can weaken the bond. Choose sand suited to your joint width, paver material, and local weather. Tip: Check the product’s joint-width range before buying. Fine joints may need different sand than wide, deep joints. I once underestimated how quickly rain could affect a fresh installation. Weather deserves more attention than many guides suggest.
Tip: Read the moisture instructions carefully. Light, even watering activates the polymer, but excessive water can remove binder from the joints. Avoid installation before heavy rain or during freezing conditions. Check the finished joints for low spots and refill them immediately. Mistakes happen. A small test area is wise, especially with porous stone or unusual paver shapes. Also inspect drainage near edges, because trapped water can damage joints despite using quality sand.
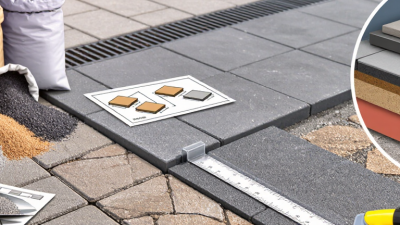
Choosing polymeric sand starts with the paver material, not the color of the sand. Concrete pavers usually accept standard polymeric sand well, especially in stable joints between 3 and 6 millimeters. Clay pavers can be more delicate. Their edges may chip during compaction, so use a finer product and lighter equipment settings. Natural stone needs extra care because textured surfaces can trap residue. A small test area is essential.
Joint size matters just as much. Narrow joints need fine particles that settle deeply without leaving empty pockets. Wider joints require a coarser blend with enough polymer to resist erosion and weed growth. If the sand is too fine, rain may wash it out. If it is too coarse, the joints may remain loose. Always check the product’s stated joint range against your actual measurements.
Site conditions can change the result. On a shaded patio, slow drying may leave a hazy film. On a sunny driveway, the surface can dry too quickly. Keep the pavers clean, dry, and free from dust before installation. I prefer testing one square meter first, then checking the joints after light watering. It is not perfect, but it reveals problems early. Poor compaction is another common mistake. The joints may look full, yet contain hidden gaps. A second pass with the plate compactor often improves stability, provided the paver surface is protected.
Strength matters, but it is only one part of performance. The Interlocking Concrete Pavement Institute recommends checking joint stability, drainage, and installation conditions together. Choose sand with tested resistance to washout and joint erosion. ASTM C144 provides aggregate grading requirements, but it does not guarantee polymeric bonding strength. Ask for independent test results, not only a product claim.
Flexibility deserves equal attention. Rigid joints can crack when pavers move slightly under traffic or temperature changes. Select a formulation designed for movement, and avoid filling joints over damp bedding. Keep joint depth consistent. A practical target is full joint filling, with material compacted in several passes. I have seen attractive installations fail because the joints looked full, but contained hidden air pockets.
Weather resistance becomes critical in wet or freezing regions. ASTM C936 sets a 8,000 psi compressive-strength requirement for qualifying concrete paving units, while absorption is limited to 5 percent. These figures describe pavers, not joint sand, but they show why the entire system needs moisture control. Check freeze-thaw testing, water activation instructions, and expected curing time. NOAA climate records can help estimate local rainfall and freeze exposure. Do not trust a generic “all-weather” label. Test a small area after curing, then inspect the joints after heavy rain. Perfect predictions are impossible. Some judgment remains.
Choosing Polymeric Sand for Pavers: Check Application Requirements and Site Conditions
Polymeric sand should match the project, not merely the paver color. Start by checking the joint width and depth specified for your paving system. Narrow joints may need finer sand, while wider joints require stronger particle bonding. Read the technical sheet carefully. It should state suitable paver types, coverage, curing conditions, and cleaning limits. I have seen attractive installations fail because the sand was chosen without measuring the joints.
Site conditions matter just as much. The base must drain properly, because trapped water can weaken cured joints and encourage movement. Remove moss, loose soil, and old joint material before installation. The pavers should be dry, and the forecast should allow enough time without rain, heavy dew, or freezing temperatures. A shaded courtyard may stay damp longer than an open driveway. That difference can change the result.
Check the slope and surface condition. Water should move away from buildings instead of collecting beside them. Uneven pavers may need resetting before sanding; polymeric sand cannot correct a damaged base. Follow the required activation method, whether it involves light misting or another controlled process. Too much water can wash binder away. Too little may leave the joints crumbly. I have occasionally underestimated drying time, especially in cool weather. That mistake is worth remembering before scheduling the final cleanup.
| Tip | Requirement to Check | Typical Site or Product Condition | Recommended Selection | Why It Matters |
|---|---|---|---|---|
| 1. Match the joint width | Measure the narrowest and widest joints between the pavers. | Common residential joints are approximately 3–6 mm wide; some systems are designed for wider joints. | Choose a polymeric sand whose labeled joint-width range covers the entire installation. | Sand that is too coarse or too fine may not fill the joint properly, reducing stability and increasing the risk of erosion. |
| 2. Consider the paver material | Identify whether the surface is concrete, clay brick, natural stone, or a permeable paver system. | Textured, porous, or irregular surfaces can retain sand residue more easily than smooth concrete pavers. | Use a product specifically approved for the paver type and follow any cleaning or residue precautions. | Compatibility affects appearance, cleanup, joint performance, and the possibility of surface haze. |
| 3. Evaluate drainage and permeability | Check whether water is intended to drain through the joints or run across the surface. | Permeable pavements require an open-graded base and joint material designed to maintain water infiltration. | For permeable systems, select a permeable jointing aggregate approved for that pavement design; do not substitute standard polymeric sand. | A dense binder-filled joint can restrict infiltration and interfere with the designed drainage function. |
| 4. Check weather and curing conditions | Review the installation forecast and the product’s required temperature and drying period. | The surface and joints should remain dry during installation and initial curing; rain or heavy dew can disrupt activation. | Choose a formulation suitable for the expected temperature range and allow the full curing time stated on the technical data sheet. | Insufficient drying can leave weak, soft, or washed-out joints. |
| 5. Match the traffic level | Determine whether the area is a pedestrian walkway, patio, driveway, or heavier-use pavement. | Vehicle areas experience greater vibration, braking forces, and joint movement than patios or footpaths. | Select a jointing product rated for the intended traffic and confirm that the base and edge restraints are also adequate. | Sand alone cannot compensate for an unstable base, inadequate compaction, or weak edge restraint. |
| 6. Review movement and climate exposure | Assess freeze–thaw cycles, frequent rainfall, standing water, and temperature changes. | Cold climates and areas with repeated wetting and drying place additional stress on joints. | Use a flexible, weather-resistant formulation that is approved for the local climate and installation type. | Appropriate flexibility helps limit cracking, joint loss, and premature deterioration caused by movement. |
| 7. Verify coverage and installation method | Calculate the joint volume and confirm the required tools, compaction steps, and water-activation procedure. | Coverage varies with paver dimensions, joint width, joint depth, and the number of compaction passes. | Use the manufacturer’s coverage chart, keep the joints filled to the required depth, and remove surface residue before wetting. | Correct quantity and installation technique improve joint density, reduce waste, and help prevent haze or washout. |
Note: Always confirm the product label and technical data sheet for the specific joint-width range, weather limitations, coverage, curing time, and permitted pavement applications.
Choosing polymeric sand for pavers requires more than comparing bag prices. Product quality, coverage, and long-term value must work together. The Interlocking Concrete Pavement Institute recommends properly compacted joints with adequate depth, while ASTM C144 provides useful aggregate guidance for masonry sand. However, polymeric sand has no single universal performance rating, so technical sheets matter.
Tip 1: Check particle grading. A balanced blend should fill narrow joints without leaving excessive dust. Tip 2: Confirm joint compatibility. Measure width and depth, because coverage changes sharply with larger joints. Tip 3: Compare realistic coverage, not package claims. Calculate square footage using your actual paver dimensions and joint layout. Small errors become expensive.
Tip 4: Review polymer content and activation instructions. Too little water may leave weak joints; too much can wash binder from the surface. Tip 5: Look for freeze-thaw and erosion testing, especially in wet climates. Tip 6: Compare installed cost over time, including replacement sand and cleaning. A cheaper product is not always cheaper after repairs. Tip 7: Read the technical data sheet and installation warranty carefully. The National Concrete Masonry Association emphasizes that drainage, compaction, and joint preparation strongly affect pavement performance. Sand alone cannot fix poor installation. That part is easy to underestimate. A practical trial area helps reveal dusting, color changes, and water sensitivity before full installation. I would also reconsider any coverage estimate that ignores uneven joints or paver edges.